|
|
 |
How to configure The Webalizer?
The Webalizer is web server log file analysis program. See The Webalizer website http://www.mrunix.net/webalizer/ for details, including sample reports.
In this tutorial, we will describe how to write configuration files and how to turn on The Webalizer, then accessing The Webalizer website, which you set up.
Writing access control files for The Webalizer. Open notepad program.
Write notepad following contents. Replace username and domainname with your actual names. When your username is more than 8 bytes, put 8 bytes as the user name.
AuthUserFile /hsphere/local/home/username/domainname/webalizer/.htpasswd
AuthGroupFile /dev/null
AuthName "Webalizer"
AuthType Basic
require valid-user
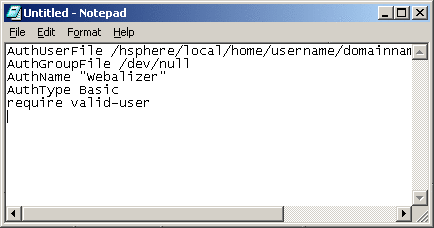
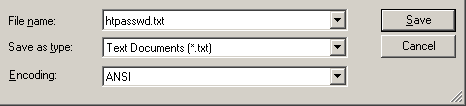
Select [File] -> [Save As] from the menu-bar, Save the content as htaccess.txt and close the notepad.

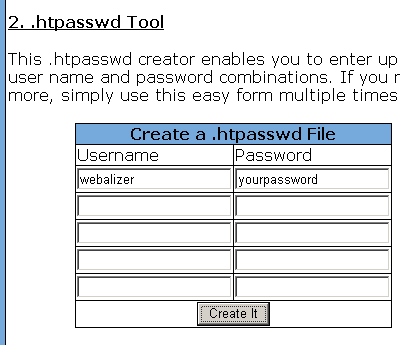
Open new notepad. Go http://www.clockwatchers.com/htaccess_tool.html, and input username and password, which you will use for The Webalizer access authentication. Don't chose a password that could be find in a dictionary and do chose a password has both letters and numbers. Then, click Create It.
Copy the encrypted password to the notepad, which you opened.
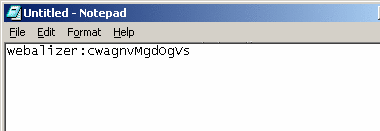
Save as htpasswd.txt and close the notepad.
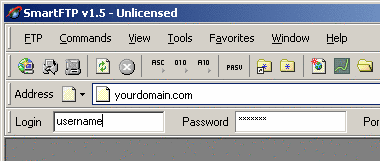
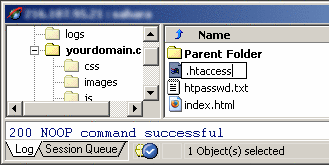
Login the domain by any ftp program. If you don't know how to use ftp programs, check this page.
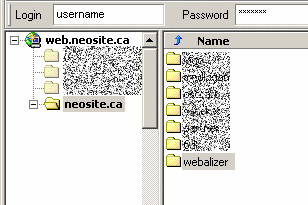
 Create directory webalizer under domainname, if it is not appear.
 Transfer both htaccess.txt and htpasswd.txt, which you made from local disk to the webalizer directory.
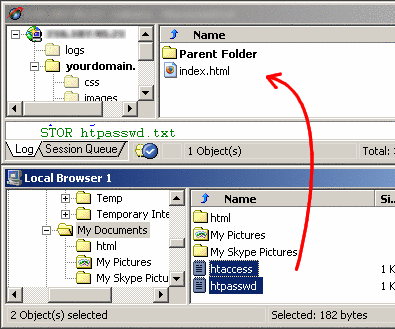 Change filename from htaccess to .htaccess by clicking F2. Change filename from htpasswd.txt to .htpasswd the same way
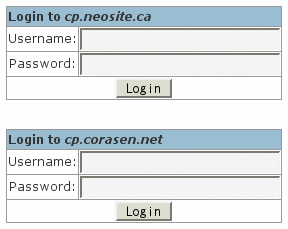
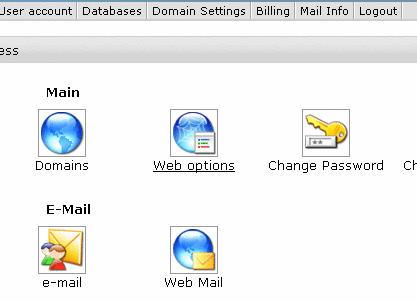
 Close ftp program. Log into control panel from our login page.
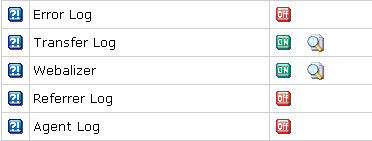
Click Web options in Main.
Turn on Webalizer by clicking OFF icon.
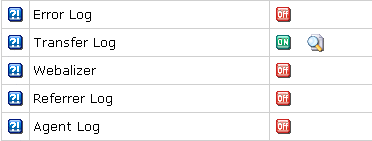
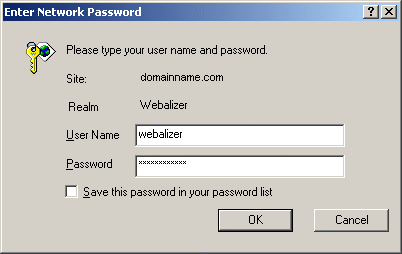
Click magnifying icon beside Webalizer
Make sure you can see authentication popup. Login using the username and password, which you set up above.
If you pass the authentication, you will see following text.
This is the default page.
Tomorrow instead of this page you will see your website statistic generated by Webalizer.
Close your web browser.
24hours later, access http://yourdomain/webalizer/ and type the username and password for The Webalizer. Make sure The Webalizer is running properly.
|
|
 |
|